|

| |
                                                 

|

|
Fishermen's Journal
|
Trolling with Tunes
Boat-Fi Installation Made Easy
by Chark (a.k.a. - Mark Smith)
As nice as solitude on a boat can be, there are times when some tunes or a
ball game can add to your day's pleasure while at sea. This really is a simple thing
to add to your boat, but most of us figure to leave well enough alone and not mess with
complicated electronic stuff. Well, it's not a tough task, maybe three hours time
might be involved at most. And is a pin-head electrician like me can get the job
done, well you're a cinch to do a professional job. You're install will no doubt be
better than mine, if this is something you try, since you'll benefit from all my
boneheadded mistakes...
| I've owned my boat for several years, but it didn't come with a radio.
Sure I had a VHF, bait tank, bilge pump, fish finder, Loran... But, no tunes
or ability to listen to a good ball game. So, I brought along a portable for a few
years, never had enough juice to hear the thing while moving, batteries were expensive,
corrosion was an issue. The portable option was never too satisfactory. Since
I've been carrying some electronics on the Tackle Store section of things, it was only a
matter of time for me to start this little project. I should have done it about five years
ago. It's really easy enough, that procrastination or pure lazyness isn't a good
excuse for putting off this project these days.
I have a small center console, didn't
really want to make a big deal about the installation, but definately wanted enough power
in the radio to push the speakers to a good volume while
under way. I was considering the cassette verses the CD option, but settled upon the
CD given it's better reliability in a marine environment. I purchased Jensen
equipment, they've been on the market long enough to have their act together in terms of
meeting the challenges of a boat installation. while
under way. I was considering the cassette verses the CD option, but settled upon the
CD given it's better reliability in a marine environment. I purchased Jensen
equipment, they've been on the market long enough to have their act together in terms of
meeting the challenges of a boat installation.
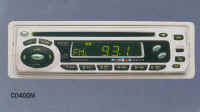 So, the
CD400M and both surface and cut out model 6.5" speakers. The CD 400 puts out
100 watts (25 X 4), has a detachable faceplate, rustproof marine chassis, and more presets
than radio stations broadcasting in English. So, the
CD400M and both surface and cut out model 6.5" speakers. The CD 400 puts out
100 watts (25 X 4), has a detachable faceplate, rustproof marine chassis, and more presets
than radio stations broadcasting in English.
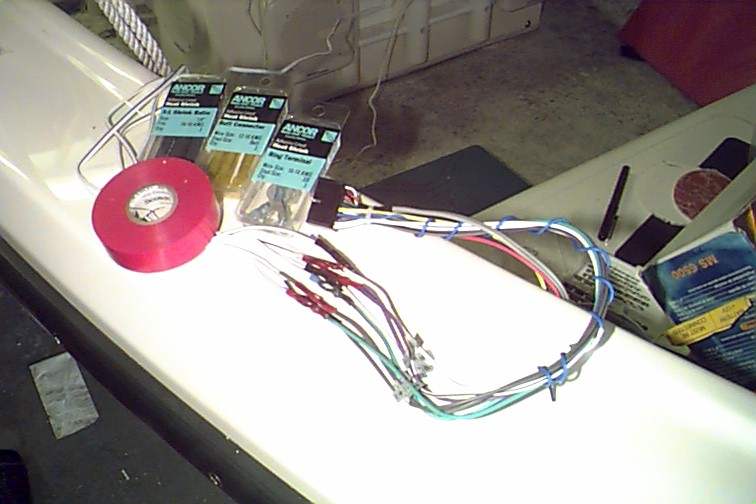
There are a couple things you'll need to have to do the installation. These
things are not part of the radio's package, but you'll need to secure them.
Essentials
- electrical cord, 12-14 ga, 12 feet or so depending upon your situation
- electrical tape
- stainless screws and self locking nuts
- shrink wrap for the wires (optional)
- electrical connectors (optional)
- radio antennae - or coupler
Tools Used
- drill
- saw
- crimper (for the connections)
- zip ties (to tiddy up the wires)
|
 |
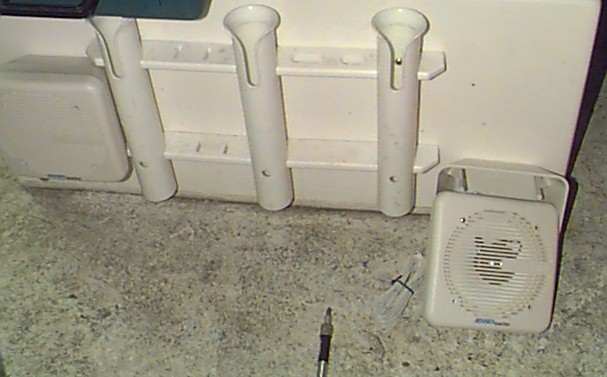
I wanted to get the installation over in a hurry, didn't want any big project.
That's exactly the way things worked out. My plan was to install
two sets of speakers on the center console, and tuck the radio inside the console itself,
since my craft can get a bit damp running back up from the 14 mile bank of other spots
that run counter to the chop and swell. I decided to stick one
set of surface mounts up front, facing forward, and the other pair off the side of the
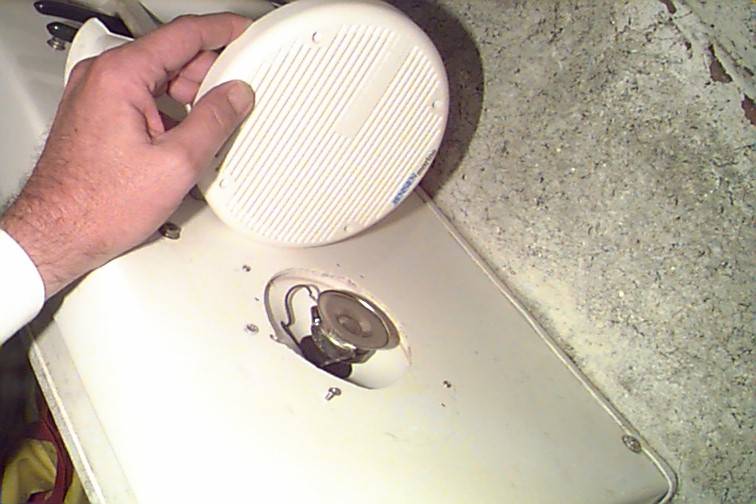
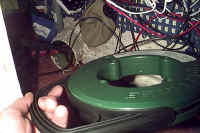
console. Installation of the speakers is not big deal. For the surface mounts
you need to take off the back, plan where you'd like to insert the screws and hole for the
speaker wire, that's about it. |
 |
 |
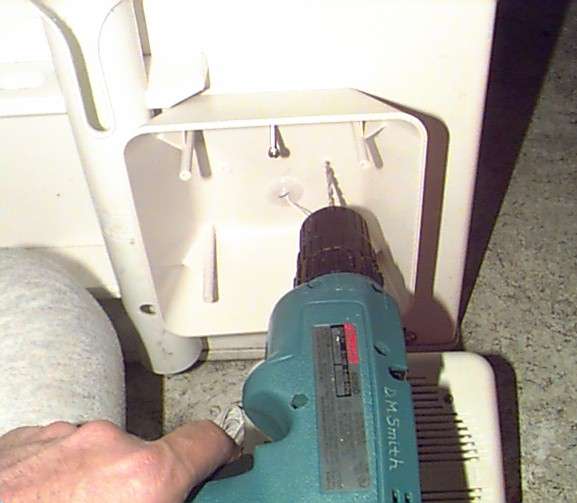
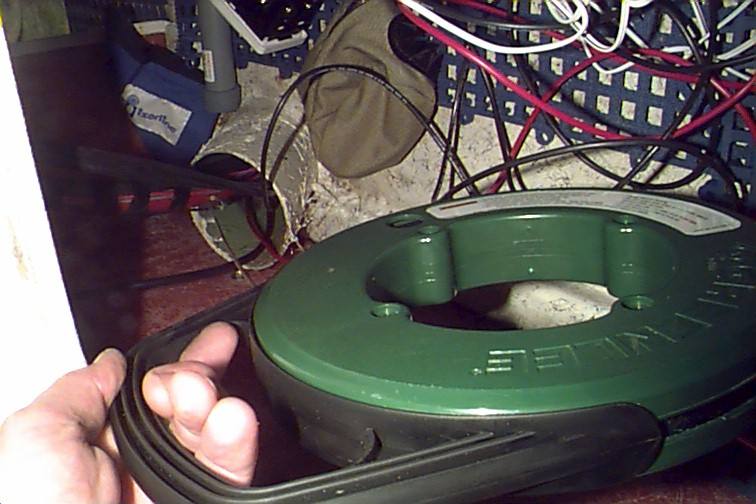
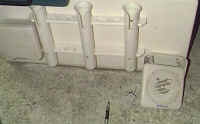
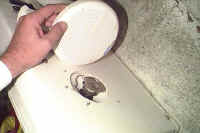
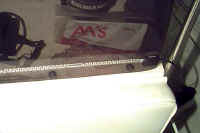
| The sealed enclosures should perform better in terms of withstanding the elements (I
think). The cut out 6.5" models were installed on the sides of
the console. I used a sabre saw to cut out a hole, then mounted the speaker behind
the cut out screwing through the grill, console, and speaker to seal the deal. The
base response is better with this set of speakers, they can use the enclosure of the
console to resonate. They've got a pretty good thump. |
|
|
|
  Well, once the
speakers were done, it was time to figure out the radio. My first response was pure
insecurity followed procrastination. But, I couldn't afford the time. It was Friday
night and I wanted to fish Saturday morning. The harness was easy to figure
out. The speaker leads are all clearly marked, so hook up is really pretty
easy. Use some zip ties to organize things. After your done. I used
connectors for the battery hookup, rigging additional wire, heat crimps and elec.
tape. Well, once the
speakers were done, it was time to figure out the radio. My first response was pure
insecurity followed procrastination. But, I couldn't afford the time. It was Friday
night and I wanted to fish Saturday morning. The harness was easy to figure
out. The speaker leads are all clearly marked, so hook up is really pretty
easy. Use some zip ties to organize things. After your done. I used
connectors for the battery hookup, rigging additional wire, heat crimps and elec.
tape.
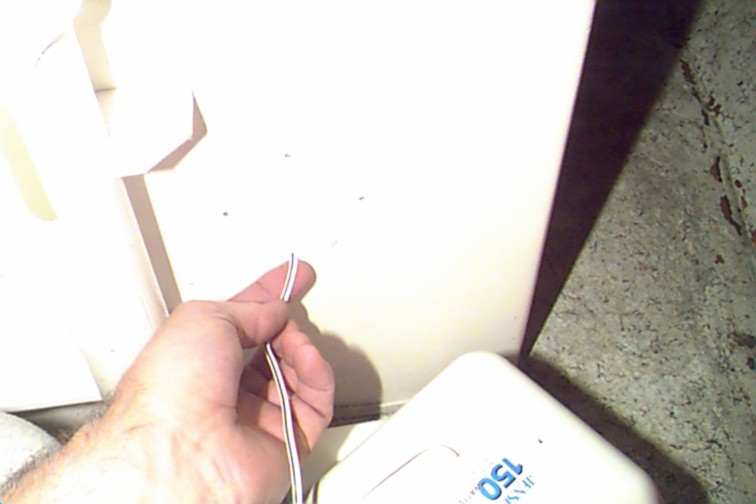
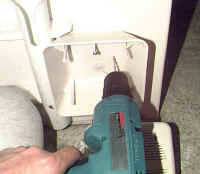
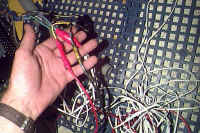
 You have one hot lead to the battery,
another to the ignition (or to the accessory switch in my case, or your battery switch...)
and the negative or ground. I went ahead and connedted the ground and the hot lead
directly to the battery. by It's wiring harness is clearly labeld, you won't make
mistakes on polarity. Just stay consistent through out your wireing. I had to
run a snake (in the pic) to string the wires back to the battery. Once that was
done I had some juice and only a couple more tasks to accomplish. You have one hot lead to the battery,
another to the ignition (or to the accessory switch in my case, or your battery switch...)
and the negative or ground. I went ahead and connedted the ground and the hot lead
directly to the battery. by It's wiring harness is clearly labeld, you won't make
mistakes on polarity. Just stay consistent through out your wireing. I had to
run a snake (in the pic) to string the wires back to the battery. Once that was
done I had some juice and only a couple more tasks to accomplish.
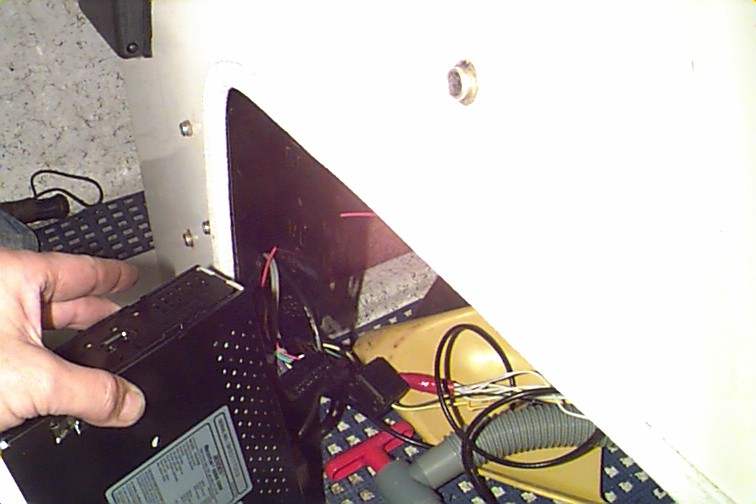
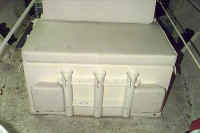
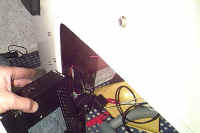 I decided to place the radio inside the console to keep it out of the
spray which is a frequent guest... Here's where I made a bone head error. Be sure
you have enough room for the radio... I came up short. If I'd mounted the
radio an inch lower she would have locked down in the DIN bracket which supports the
radio. As it is, I had to use an extra brace to keep the radio in place when I go
airborne. I purchased I decided to place the radio inside the console to keep it out of the
spray which is a frequent guest... Here's where I made a bone head error. Be sure
you have enough room for the radio... I came up short. If I'd mounted the
radio an inch lower she would have locked down in the DIN bracket which supports the
radio. As it is, I had to use an extra brace to keep the radio in place when I go
airborne. I purchased
 stainless hardware for mounting the
radio's bracket to the console, three screws and nuts. The last detail was the
antennae. There are two ways to go here. You can use a coupler to your boat's
VHF antennae or you can go with a dedicated antennae. I decided to get a separate
antennae. It was about 1/2 - 2/3 the expense of the coupler. It's a pretty
nifty stick on contraption. The thing installed within about 20 seconds, and works
great. stainless hardware for mounting the
radio's bracket to the console, three screws and nuts. The last detail was the
antennae. There are two ways to go here. You can use a coupler to your boat's
VHF antennae or you can go with a dedicated antennae. I decided to get a separate
antennae. It was about 1/2 - 2/3 the expense of the coupler. It's a pretty
nifty stick on contraption. The thing installed within about 20 seconds, and works
great.
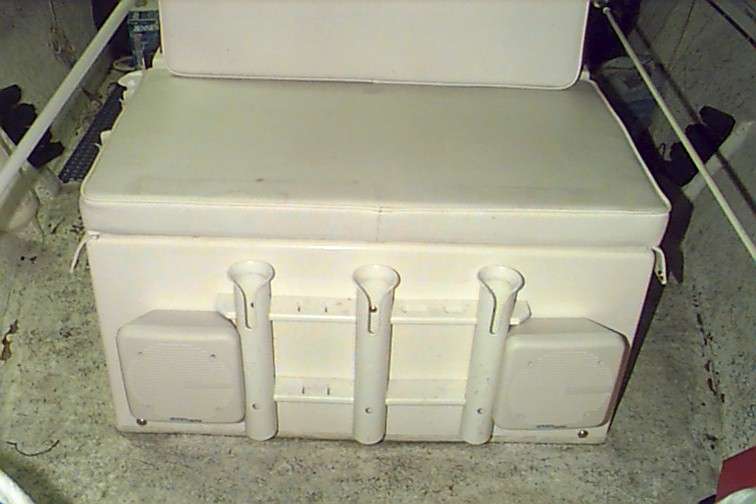
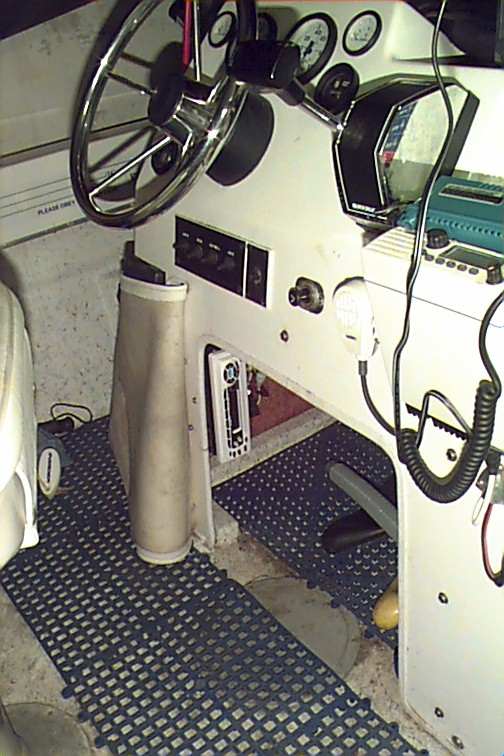
 Here's the radio in it's protective place. The performance is quite
good, way better than my expectation of what it would sound like. The speakers
handle the power well, and there's ample amplitude for rock-n-rolling while under way.
In all I'd say I spent about three hours on the installation, including a trip to
buy the screws for the speakers and radio bracket. The owner's manual provides some
installation info, not a whole bunch, but really there's not a whole lot to know.
It's a quick and painless job. You could get by with no cutting, only 18 drill
holes, and a small amount of hardware for this project. Your return on time invested
should be pretty darn high. It's a great, easy, enhancement of your boat, any boat
that has a battery is a good candidate for adding some tunes. Here's the radio in it's protective place. The performance is quite
good, way better than my expectation of what it would sound like. The speakers
handle the power well, and there's ample amplitude for rock-n-rolling while under way.
In all I'd say I spent about three hours on the installation, including a trip to
buy the screws for the speakers and radio bracket. The owner's manual provides some
installation info, not a whole bunch, but really there's not a whole lot to know.
It's a quick and painless job. You could get by with no cutting, only 18 drill
holes, and a small amount of hardware for this project. Your return on time invested
should be pretty darn high. It's a great, easy, enhancement of your boat, any boat
that has a battery is a good candidate for adding some tunes.
|
|
 Well, once the
speakers were done, it was time to figure out the radio. My first response was pure
insecurity followed procrastination. But, I couldn't afford the time. It was Friday
night and I wanted to fish Saturday morning. The harness was easy to figure
out. The speaker leads are all clearly marked, so hook up is really pretty
easy. Use some zip ties to organize things. After your done. I used
connectors for the battery hookup, rigging additional wire, heat crimps and elec.
tape.
Well, once the
speakers were done, it was time to figure out the radio. My first response was pure
insecurity followed procrastination. But, I couldn't afford the time. It was Friday
night and I wanted to fish Saturday morning. The harness was easy to figure
out. The speaker leads are all clearly marked, so hook up is really pretty
easy. Use some zip ties to organize things. After your done. I used
connectors for the battery hookup, rigging additional wire, heat crimps and elec.
tape.